If your monofilament line is fighting scrap, “mystery” diameter drift, ovality, or frequent breaks, the fix usually isn’t one magic setting. It’s the drawing (stretching) section doing what it’s supposed to do: hold speed, tension, and temperature steady enough that the filament exits the line with predictable geometry and properties.
This article explains what a plastic monofilament drawing machine is, what modules matter, and the practical controls plants use to make high-quality single filament (monofilament) in nylon/PET/PP/HDPE production.
What is a plastic monofilament drawing machine?
Think of extrusion as “making the strand,” and drawing as “setting the strand.”
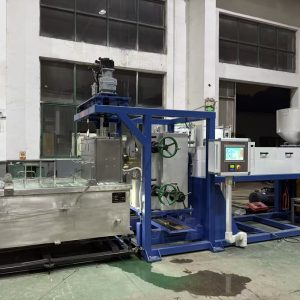
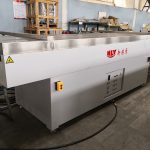
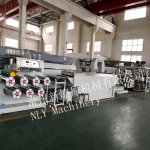
A monofilament drawing machine (also called a monofilament drawing line or monofilament stretching machine) is the downstream section of a monofilament production line that pulls the as-extruded filament through one or more controlled draw stages—often with a hot-water bath or oven—so the filament reaches its final diameter, achieves polymer orientation (strength/modulus), and becomes more dimensionally stable.
In a complete line, drawing sits after the die and quench, and before final winding. A helpful high-level process reference is PLASCO’s overview of the monofilament extrusion process with stretching and annealing stages (2023).
If you’re searching for how to produce high quality monofilament, the fastest path is to treat drawing as a controlled system (speed + tension + thermal window), not a single “stretching” step.
How drawing affects diameter, strength, and ovality
Drawing isn’t just “making it thinner.” It’s a controlled deformation process.
Diameter control is mostly draw ratio + stability
In practice, monofilament diameter control is less about one static die setting and more about keeping flow, temperature, and haul-off speeds stable enough that the line stops “hunting” for size.
Your final diameter is driven by the relationship between:
Mass flow out of the die (how much polymer you push)
Take-off speed and draw ratio (how much you pull)
If speed or tension fluctuates, diameter will wander. That’s why many lines rely on continuous diameter monitoring—often laser-based—so operators don’t discover a drift after a whole spool is wound. NLY discusses practical factors like draw speed synchronization, tension variation, and laser diameter monitoring in its article on drawing stages and laser diameter monitoring in a monofilament extrusion line.
Strength and stiffness come from orientation (within a safe window)
When you draw (stretch) the filament at the right temperature, polymer chains align more in the machine direction. The result is typically higher tensile strength and modulus.
But there’s a tradeoff: push draw ratio too hard, or draw too “cold,” and the filament can become brittle or break during drawing or winding.
Ovality is often a cooling and alignment problem
Ovality (out-of-round cross-section) is usually less about the die and more about asymmetric quenching or uneven tension.
If one side of the filament cools faster, or the filament path is off-center through guides/rolls, you can lock in a non-round shape that won’t disappear later—especially after heat-setting.
Pro Tip: When ovality suddenly appears after a speed increase, suspect quench symmetry and line alignment before you start changing the die.
The key modules in a monofilament drawing (stretching) line
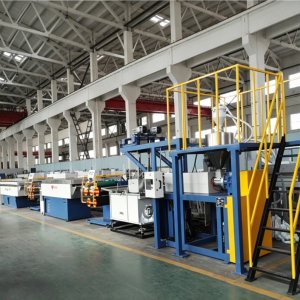
Different suppliers configure modules differently, but most production-capable drawing systems include these building blocks.
1) Quench (cooling) section
The quench sets the “starting geometry” that drawing will refine. In practice, stable quench means:
Consistent bath temperature
Symmetric flow (avoid one-sided turbulence)
A stable, centered filament path
If quench conditions wander, you’ll chase diameter and roundness downstream.
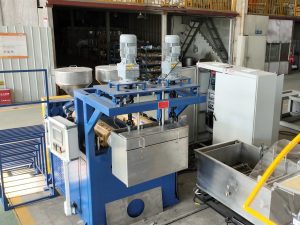
2) Godets / draw rollers (single or multi-stage)
Godet rolls (or capstans/pullers) create the draw ratio. This is where the line becomes a control system:
Each stage has a target speed
The speed difference between stages defines the draw
Synchronization errors show up as diameter variation, breakage, or property scatter
3) Heating in the draw zone (hot-water bath or oven)
Heating gives the polymer enough mobility to draw without micro-cracking or necking.
Common options:
Hot-water bath drawing (often used as a stable, uniform heat source)
Hot-air oven drawing (often used for a second draw stage)
PLASCO explicitly calls out hot-water-bath stretching and additional stretching/annealing stages in its monofilament process overview (2023).
4) Annealing / heat-setting
Heat-setting is where many lines “lock in” dimensional stability.
If you’ve ever seen a filament that measures fine on-line but later shrinks, warps, or behaves inconsistently in weaving/braiding/tufting, heat-setting is a prime suspect. You’re not just aiming for a number—you’re aiming for a stable number over time.
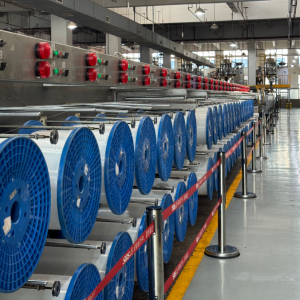
5) Tension control + winding
Good winding is not cosmetic. Poor package build can:
Nick the filament
Create local tension spikes
Cause crossovers and breakage
Winding tension needs to be consistent and matched to the filament’s stiffness and surface finish.
How to produce high-quality monofilament (what to control and what to measure)
“High quality” means your product meets spec repeatably, shift after shift. Here’s a practical control stack that works across nylon/PET/PP/HDPE lines.
Control 1: Start with stable material condition
Before you touch speeds, confirm:
Resin is consistent (grade/viscosity/MFR)
Regrind ratio is controlled
Contamination is minimized
For hygroscopic polymers (especially nylon and often PET), drying is not optional—moisture can drive bubbles/porosity and downstream breaks.
Control 2: Stabilize melt flow to avoid size oscillation
If melt flow surges, diameter surges.
Practical checks:
Temperature zones are stable (avoid heater cycling)
Screen packs/filters are maintained so pressure doesn’t “sawtooth”
Feed rate is consistent
For broader extrusion failure modes (including melt fracture context), EdTech Books provides a helpful baseline reference in its extrusion problems and troubleshooting chapter (2011).
Control 3: Treat draw ratio as a recipe, not a knob
Your draw recipe should define:
Stage speeds
Target tension window
Draw-zone temperature window
Heat-setting conditions
Change one variable at a time, and log the result. If your line “runs on tribal knowledge,” you’ll get tribal outcomes.
⚠️ Warning: Fixing diameter issues by only changing winding tension often masks the real cause (speed sync, quench, or melt stability) and can increase breakage risk.
Control 4: Keep quench symmetric to protect roundness
Ovality problems often disappear when you:
Re-center the filament path
Reduce turbulence
Stabilize bath temperature and flow
If you need a quick diagnostic: slow the line slightly. If ovality improves quickly, you likely have a quench-limited stability issue rather than a die geometry issue.
Control 5: Measure what matters (and define acceptance checks)
Plants that consistently hit spec usually measure:
Inline diameter (continuous trend + alarms)
Spot checks for ovality (max-min diameter on cut samples)
Tensile and elongation (to confirm you’re in the correct orientation window)
Visual surface inspection (gels, streaks, bubbles, burn marks)
Winding quality (package density, crossovers)
Troubleshooting map: symptom → likely zone → first checks
Use this as a first-pass decision tree before you start changing five parameters at once.
Symptom | Likely zone | First checks |
|---|---|---|
Diameter drifts slowly over time | material / temperatures / feed | dryer stability, hopper level, zone temp drift, feeder consistency |
Diameter swings cyclically | melt flow or puller stability | pressure oscillation, heater cycling, puller slip, speed loop tuning |
Ovality increases at higher speed | quench + alignment | bath symmetry, die-to-bath distance, guide alignment, filament centering |
Bubbles / porosity | moisture / volatiles / trapped air | dryer performance (nylon/PET), melt temperature too high, venting/back pressure |
Rough surface / streaks | contamination / stress at die | filtration/screen pack condition, die cleanliness, shear stress, degraded material |
Breaks in drawing or winding | overdraw / tension spikes / defects | draw ratio too aggressive, draw zone too cold, nicks on guides, winding tension |
For a practical discussion of how trapped air can manifest as bubbles and surface issues in extrusion, Bausano’s overview of common problems in plastic extrusion (including trapped air) is a useful starting point.
Buyer’s checklist: what to look for in a monofilament stretching machine
If you’re evaluating equipment, you’re not just buying rollers and heaters—you’re buying process stability.
Machine capability checklist
Speed synchronization accuracy across draw stages (and how it’s verified)
Tension control strategy (sensors, control loops, anti-slip design)
Thermal uniformity in hot-water bath/oven (how temperature is stabilized and measured)
Quench design that supports symmetric cooling at your target throughput
Inline diameter gauge integration (data logging, alarms, closed-loop options)
Heat-setting/annealing capability for dimensional stability (if your application needs it)
Serviceability: wear parts, access to guides/rolls, cleaning time, spares package
Commissioning + training: SOPs, changeover recipes, troubleshooting training
RFQ questions that save you pain later
What diameter tolerance and ovality window have you achieved on similar resin and end-use—and how was it measured?
How do you prevent speed mismatch between draw stages (hardware + controls)?
What’s the recommended draw/heat-setting recipe range for nylon vs PET vs PP/HDPE?
What alarms/interlocks exist for diameter drift, tension spikes, and heater instability?
What’s included in FAT (factory acceptance test), and what samples should we run to validate performance?
If you’re also selecting the upstream extrusion system, NLY’s guide on how to choose a monofilament extrusion machine pairs well with this drawing-focused checklist.
Next steps: get a line configuration and a validation plan
If you want to turn this into a stable, repeatable production recipe, it helps to map your target filament spec (material, diameter range, end-use, and required properties) to a full line configuration—quench, drawing stages, heat-setting, and winding—plus a FAT/run-sample plan.
As a manufacturer of monofilament extrusion equipment since 1989, Changzhou New Liaoyuan Machinery Co., Ltd. (NLY) can support a practical evaluation: define acceptance checks (diameter trend, ovality sampling, tensile/elongation window) and propose a drawing-section configuration that matches your resin and throughput targets.
For budgeting and procurement planning, you can also review common cost drivers in monofilament extrusion machine price factors.