Buying a nylon monofilament extrusion line isn’t hard because the process is mysterious. It’s hard because different suppliers bundle different modules, quote different “capacities,” and use different definitions of what counts as stable production.
If you’re in the comparison stage, the goal isn’t to memorize how extrusion works. The goal is to create a repeatable way to:
define your pass/fail requirements (diameter stability, ovality, break rate, energy, uptime)
compare quotes on an apples-to-apples basis
validate claims during a trial run and a Factory Acceptance Test (FAT)
This guide gives you a line-level evaluation framework for PA6 monofilament extrusion line and PA66 monofilament extrusion line projects.
Step 1: Lock down requirements before you compare suppliers
Two buyers can order “the same” PA line and get very different outcomes—because the hidden variables were never written down.
Define what “good filament” means for your product
Start with the quality metrics your downstream customer actually cares about:
Diameter tolerance and your measurement method
Ovality / out-of-round limit (if relevant)
Surface defects that trigger rejections (lines, gels/specks)
Mechanical targets (tenacity/strength, elongation) and test method
Package requirements (spool size, traverse pattern, winding density, changeover expectations)
Pro Tip: Don’t ask suppliers for “maximum output.” Ask for your target stable output at your tightest tolerance, plus what conditions must be held constant to achieve it.
Clarify your nylon resin reality
Nylon is sensitive to moisture and processing history. If the resin handling plan is vague, your quality plan will be fragile.
At a minimum, document:
polymer family: PA6 or PA66 (and any copolymers)
additives: pigments, fillers, slip agents
regrind policy (if any)
expected ambient humidity exposure between dryer and hopper
For a grounded overview of PA processing considerations (including drying and extrusion temperature ranges), see SpecialChem’s Polyamide (Nylon) guide.
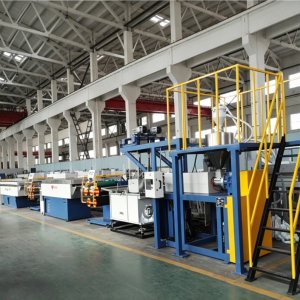
Step 2: Evaluate the nylon monofilament extrusion line as “zones” (not as a single machine)
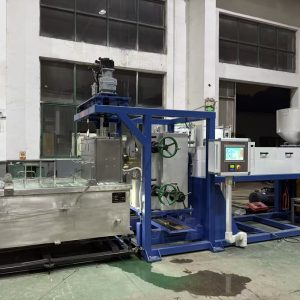
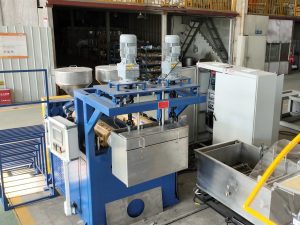
A monofilament extrusion line is a system: melt delivery → shaping/cooling → drawing/orientation → heat setting → winding. If one zone drifts, the downstream zones usually can’t save you.
If you want a quick system-level refresher, use this system view of the monofilament extrusion process—then come back to the evaluation framework below.
What “stable” means in practice
For a supplier comparison to be meaningful, define stability in operator-friendly terms:
diameter stays within tolerance over a defined sampling window
ovality/out-of-round stays controlled (if it’s a customer requirement)
break events remain within your limit at the target output window
time-to-stability after startup/changeover is predictable
This is also where you’ll catch “paper capacity” versus real capacity.
Zone A: Drying & feeding (PA quality starts here)
What to ask suppliers
How is nylon drying controlled—by temperature/time only, or with dewpoint monitoring?
How do you prevent re-absorption between dryer and hopper (sealed conveying, hopper design, procedures)?
What is the recommended moisture-check routine (what instrument, how often, what trigger stops the line)?
What to verify during trials
Your dryer settings and conveying method can hold moisture low consistently over a shift.
Operators can execute the resin-handling SOP without “heroics.” (If it only works with one senior operator, it won’t scale.)
Zone B: Extruder + melt filtration / melt delivery
This zone sets the baseline for diameter stability. If melt temperature or pressure swings, you’ll fight it everywhere else.
What to ask suppliers
What screw design is proposed for PA, and what is it optimized for (homogeneity vs. throughput vs. low degradation)?
What’s included for melt cleanliness (screen pack, filtration approach), and how are changes done without shocking melt pressure?
Is a melt pump/gear pump included, and what problem is it solving in your configuration (pulsation reduction, metering stability, pressure decoupling)?
What to verify during trials
Can the line run steady-state without frequent screen interventions?
Is melt pressure stable enough that downstream speed control doesn’t become a constant correction loop?
If you want a quote-comparison checklist for “what’s actually included” versus optional, this breakdown of cost factors that change a monofilament extrusion line quote is a useful reference.
Zone C: Die / spinneret + quench water bath
Most buyers focus on the die. In reality, the die + quench system is what determines how quickly and how evenly the initial geometry “locks in.”
PLASCO’s process overview notes that filament diameter depends not only on nozzle hole size, but also on the distance between the die pack and the water interface in the quench bath.
What to ask suppliers
How do you control quench bath temperature and flow stability?
What is the strand path control (guides, alignment, vibration control) to prevent asymmetric cooling?
How is quench distance set and kept repeatable during startup and after maintenance?
What to verify during trials
Measure ovality/out-of-round over time (not only “average diameter”).
Watch what happens during a controlled disturbance (speed change, resin lot change, screen change): does the line return to stability quickly?
Zone D: Take-off / godets + drawing stages
Drawing is where the filament’s mechanical properties are built—and where breaks and scrap often appear if speed ratios or heating drift.
This is the zone most operators describe as the monofilament drawing process: a controlled sequence of speed ratios and heating windows that turns a quenched strand into a stable, high-performance filament.
What to ask suppliers
How many draw stages are included, and what is the control method for draw ratios?
What is the heating method (hot water vs. hot air), and how is temperature uniformity verified?
How is tension managed between stages (sensing, control loop, anti-slip design, alarms)?
What to verify during trials
Break events per shift at your target output window
Parameter repeatability: if you stop and restart, how long until you’re back in tolerance?
For a practical list of defect modes and starting-point checks (diameter drift, ovality, gels/specks, breaks), see this breakdown of common monofilament quality issues and what drives them.
Zone E: Heat setting / annealing
Even if your diameter is stable at the quench, parts can still fail later due to shrinkage or inconsistent properties. Heat setting is where you stabilize dimensions and reduce unpredictable behavior.
What to ask suppliers
Is annealing/heat setting included, and how is it controlled and documented?
What recipes can be stored (temperatures, speeds, tensions), and can they be locked by role?
What to verify during trials
Product stability after cooling and winding (shrinkage behavior depends on your spec and end-use)
Recipe repeatability across operators and shifts
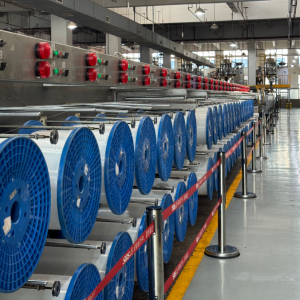
Zone F: Winding (quality losses often show up here)
Winding isn’t “just packaging.” Poor tension control or traverse control can turn stable filament into a customer complaint.
What to ask suppliers
What winding method is included (spindle count, changeover method, tension control)?
What package defects are typical failure modes (soft edges, telescoping, inconsistent density), and how does the winder prevent them?
What to verify during trials
Package build quality at steady-state and after speed changes
Changeover behavior (if applicable): does it spike breaks or drift out of tolerance?
Step 3: Make quotes comparable (what to list in your RFQ)
A clean RFQ doesn’t make suppliers cheaper—it makes your comparison fair.
Include these sections:
Product spec: diameter range, tolerance, ovality limit, surface requirements, spool/package requirements
Material spec: PA6/PA66 grade, additives, regrind, drying expectations
Performance target: stable output window (kg/h) and line speed range (not maximum)
Line modules included: drying, filtration/melt delivery, quench control, draw stages, heat setting, winder details
Automation + measurement: what’s measured in-line, what alarms exist, what data is logged
Utilities + footprint: power, cooling water, compressed air, installation conditions
Commissioning + training: days onsite, training scope, handover documents, recommended spares
If energy cost matters (it usually does), define whether you want line-level specific energy consumption (SEC) tracking and how it’s measured. This guide on how to verify specific energy consumption (kWh/kg) on an extrusion line is a practical starting point.
Step 4: Require proof — a trial plan + FAT checklist
A supplier can promise tolerance. You want a plan that makes it measurable.
For a module-by-module line map (drying, quench, drawing, annealing, winding), see PLASCO’s monofilament extrusion process guide.
JDSTex’s supplier-selection checklist emphasizes trials, references, and FAT/SAT as validation steps.
Minimum trial run questions (use these to force clarity)
What is the sampling window for diameter stability (e.g., after stabilization, then measured over a defined time)?
How will ovality be checked (one-axis vs. two-axis measurement), and at what frequency?
What defect log will be kept during the run (breaks, surface lines, gels/specks), and what is acceptable?
What is the time-to-stability after startup and after a controlled change (speed or screen change)?
⚠️ Warning: If a supplier won’t define pass/fail criteria with you, you’re buying a debate—not a line.
Next step: Turn this into your one-page comparison sheet
If you want, share these four inputs:
PA6 or PA66 (and your target diameter range)
your tightest tolerance and ovality limit
target stable output window (kg/h)
key defect you must eliminate (drift, ovality, breaks, gels, surface lines)
…and we can map them into a practical line configuration and a trial/FAT checklist you can use to compare suppliers.